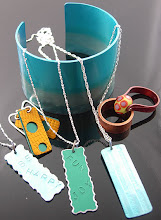
Anodising aluminium is such a fickle process, one little thing goes wrong, and the whole anodising process has to be repeated. Admittedly, I do love the challenge and the new knowledge it brings. I think it would be a sad moment when you felt you had all the knowledge you could possibly have on one subject, if there was nothing else to learn, what satisfaction would you have continuing with it?
This weeks problem was that a dye I'd recently purchased and which had been giving excellent results has not been successful on my last 2 attempts. With the anodising process, this could be contributed to many things, but as with all things the more experience you have it becomes a little easier to pinpoint. My suspicion was that the PH balance wasn't correct in the dye. Another purchase necessary, a PH meter, which proved my theory to be correct. Ah the trials and tribulations of anodising!
I have enjoyed experimenting with duo colours, a lengthy but intriguing process, where the item is dyed, then dried, a rubber cement ran over areas where the base colour will be retained. Then the piece is placed in diluted ammonia to remove the remainder of the dye, then redyed and sealed. Once the sealing process is complete then the messy job of removing the rubber begins! I did show a cuff done with this method in my last post, here are a few more examples of my anodised jewellery in two colours.


2 comments:
Ooh, I really love the Funky Anodised Aluminium Cuff. What stunning pieces!! :)
love all of these photos :)
nice blog :)
follow me on:
http://www.bloglovin.com/en/blog/2187105/glamourgirl
http://glamourgirl-bg.blogspot.com/
Post a Comment