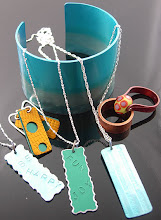
As I mentioned in an earlier posting I have become intrigued with the idea of anodising aluminium to use in a new line of jewellery. I am now embarking on that challenge and am inviting you to come on a journey with me through the process of setting up and hopefully being successful with this project.
I have done endless research on the process and have now began to source my supplies and set up the different stages needed. Before I go into my setting up process, I must make it very clear that this process involves working with dangerous acids. I can't emphasise enough that you must take extreme care when handling the products, wearing safety gear and working in a well ventilated area.
I had read that sourcing the chemicals may be a problem but I found they were readily available here in South Australia at Ace Chemicals. I bought 2.5 litres of Sulphuric Acid 98% Solution; 2.5 litres of Nitric Acid 70% and 5 kg Caustic Solda crystals (Sodium Hydroxide Pearl). Total cost of the chemicals $177.00, and the quantities I bought should last me some time.
The very first stage is to find a suitable area to work with acids. I cleared a bench under a carport outside where I have plenty of fresh air circulating, as it is an open space with no doors and only partially closed sides.
Next step is to wear suitable safety glasses and a respirator, both available from hardware stores. To complete the safety attire, a pair of strong rubber gloves and a heavy duty plastic apron. I'm still hunting for a suitable apron, for now I am wearing a heavy leather apron which nearly weighs me down to the ground.


I made all the 'baths' first, labelling each one. I'll firstly tell you how I prepared each bath, then I will describe each step of anodising in Part 2 which will then make the purpose of each bath clear. Keep in mind all my preparation is done on a reasonably small scale as it is for the purpose of small jewellery components only. If you were planning on anodising car parts, etc. it would need to be on a larger scale.
ALWAYS ADD THE ACID TO THE WATER IN ALL THE BATHS, NEVER THE WATER TO THE ACID
HAVE A BUCKET OF WATER WITH SODIUM BICARBONATE (BAKING SODA) MIXED IN. IF ANY SPILLS USE THIS MIXTURE TO MOP UP AS IT NEUTRALISES THE ACID.

Degreaser - In a small jar with a screw top lid I have added a heavy duty detergent mixed in cold tap water.
Rinse Bath - In a 2 litre icecream container I have added a couple of inches of distilled water - now known as demineralised water and available from the hardware store or supermarket. You will need quite a lot of this, I bought a 4 litre container and found I needed another. If you can buy it in bulk, it would work out much cheaper, I'm paying about $6.00 for 4 litres, something I need to source in larger quantities.

Caustic Bath - In a 2 litre icecream container I added 1 litre of water and then 160 grams of Caustic Soda.

Nitric Bath - In a 2 litre icecream container I poured in 1 litre of water and to that very carefully added 250ml of Nitric Acid.

Anodising Bath - In a reasonably large plastic container I add 3.5L of distilled water, then carefully poured in 700ml of Sulphuric Acid. I read the quantity to be Sulphuric Acid and distilled water 20% by volume.

I have made one run through of the process at this stage without success as I required some aluminium wire which I have finally sourced and am now waiting on delivery. Hopefully I will receive that soon and will then continue onto Part 2, showing the step by step process and how to set the anodizing bath up ready for connection to a battery charger for the electric current needed.
I'm enjoying my new challenge and am looking forward to a successful result. It's not an overly expensive project to set up, but the most time consuming and frustrating part is finding suppliers for all the items that are needed.


2 comments:
Hi Lorraine, great to hear someone is exploring this at home anodizing process. Have you had any success in the dying process? would be good to hear as I am also exploring this. Christine
Hi Christine,
After coming across so many problems I gave up for a while, but have just completed a 7 week anodising course which has been a huge help, and I am back anodising again.
I am more than happy to answer your questions if I am able, and it may be a good idea to publish any questions in a post so as to help others.
I haven't updated my blog in such a long time, this is probably a good time.
Post a Comment