Monday, June 30, 2008

My Necklace is ready for Viewing!


After working out the components for this piece and showing you all last week, to my great disappointment I found 2 of the strands of pearls had holes that were too small to thread onto my weaving cord. I had made the focal bead to go with the colours of the pearls so had to do a frantic search for beads in similar hues. Luckily I found just enough pearls to go with the strand I could use, but I didn't have any in the copper colour I had planned on designing with. I decided to bring the copper in with some Swarovski crystals I had, and I think considering all the hiccups it has come together well. I like the extra sparkle the crystals have added without being over the top in the bling department.


Sleeping Beauty


Sleeping Beauty Detail


So what do you think, the sudden change to crystals has still given me the colour affect I was after. Another lesson learnt, always check the hole size before planning ahead.


Friday, June 27, 2008

Lampwork Beads: From Molten Glass to Wearable Art


This is an article I wrote quite some time back and thought you may enjoy reading it:


My devotion to glass is insatiable, it's molten state has an almost hypnotic effect on me. From a solid strip of glass on a hot flame, it becomes molten in front of your eyes and can then be manipulated by the artist to produce a beautiful intriguing lampwork bead. The bead may then become an integral part of a piece of jewellery, worn proudly for many years and passed down as a heirloom for generations to come.

It has been recorded in history the earliest form of glass beads discovered were made around 3000bc. These beads were used mainly for trade. In the late 1200's Venice became the major city for bead artists when the production was moved to the island of Murano.

Lampwork beads were made directly from a furnace. A mandrel (wire) was dipped into the crucible of molten glass and wound around the mandrel. Further progress was made by the Venetians who used an oil lamp connected to bellows. The pumping of the bellows added oxygen to the flame in order to increase the heat sufficiently to melt a glass rod which would be wrapped around a mandrel to form the bead.

Today, as a lampwork artist my method of making glass beads does not differ greatly from the 1500’s. There is no longer the need to pump bellows to gain the desired heat, instead a bench burner is attached to a source of both gas and oxygen. These fuels mixed together produce a very hot flame in which the glass is melted and wrapped around a stainless steel mandrel coated with a bead release to prevent the bead from sticking.

The intricate designs seen on many lampwork beads are made in a variety of methods. A great deal of decoration is created by pulling a thin thread of molten glass called a 'stringer'. The stringer is then added to the bead whilst in the flame in dots or lines to form many different patterns.

There are quite a few major manufacturer’s producing glass rods specifically for lampworking. It is very important that the glass used in a bead is of the same coe - coefficient of expansion. This means the glass must be compatible with one another so that they expand and contract at the same rate, if not, cracking will occur. In many cases 2 glasses from different manufacturers or even the same manufacturer may not be compatible. My lampwork techniques are a little different in that I prefer to use compatible sheet glass which I cut into strips. This source allows me to work with a wider colour palette.

Some amazing effects can be experienced with the inclusion of fine silver wire. When added between 2 layers of glass the silver will often result in a gold colour, whilst on the surface will retain it's silver effect. Leafs or foils of silver, gold, palladium and copper also add to the uniqueness of a lampwork bead. A new design can be discovered every day along with different shapes and intriguing sculptures.

The durability of a lampwork bead is often a question asked, after all it is made from glass. All lampwork beads with no exception should be put through an annealing cycle immediately after it is taken out of the open flame. This is achieved by placing the bead into a preheated kiln at approximately 530ºc/985ºf , this temperature may alter slightly according to the type of glass used. My beads remain in the kiln until I have completed creating for the day (approx. 7 hours), left at that temperature for another hour, then switched off where my well insulated kiln will slowly reduce the temperature over the next 9 - 12 hours. The annealing process eliminates any stresses in the bead to give it a more stable condition.

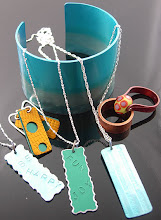
Lampwork beads are miniature canvasses of art. They are a conversation piece that will always fascinate. Lampwork beads are meant to be touched and admired as wearable art, a focal point of an item or showcased as a collector's specimen.


Thursday, June 26, 2008

What will my next Lampwork piece be?


It's time to begin another necklace project. I have all my components, but not a planned direction to follow. So this evening I will cut all my threads, sit down with all my goodies and see what transpires. Here is what I have to work with -


3 strands of pearls


Lampwork spacer beads and the toggle bead


A very organic styled lampwork focal bead


Japanese seed beads


Hopefully I'll have something finished in the next couple of days!


Now on a totally different topic-


I work on an emac computer, and for the last week or so I was having a problem where each morning when I switched on my computer I'd receive a message to say that my date and clock had reverted back to pre 1980. I'd go into my system preferences and alter the date and clock which was always set on 1/1/1970, lock my preferences in and then repeat this procedure the following morning. Now I have been trying to conserve electricity and when I turn my computer off at night I also turn it off at the wall plug. This I now have discovered is a big no no! After doing some research I discovered that the date/clock function actually works off the power of a PRAM battery. When the computer is switched off but not at the plug it still receives enough current to keep the charge in this battery, but as soon as the plug is switched off the battery starts to drain, and eventually becomes flat. It is functioning properly now as it seems I caught the problem before it flattened the battery. Now I'm quite sure not all computers work with a PRAM battery, but many do, so the moral of this story is Don't turn your computer off at the wall plug!


Monday, June 23, 2008

6 Ways to Make a Successful Exhibition


I attended an opening of an art exhibition last week, one of many I have been to but this particular exhibition was a noteworthy event. It was very successful with red dots appearing on many of the pieces, regardless of the varying prices. When I asked myself the question, why the success, the answers came very easily, so I'm going to share my thoughts with you.


1. Keep your costs down - An exhibition can be costly when renting the space. I have looked at the costs of this particular venue and have calculated the space rented was approx. 33 metres with a charge of $450.00. The solution in making this affordable was to have three exhibitors in different mediums, to share the costs.


2. Work to a theme - The three artists chose the theme of 'changing landscape' which they each interpreted into their work of oil paintings, kiln formed glass murals and ceramics, which really connected the three mediums well.


3. Choose the opening speaker who can relate to the theme - The artists chose a Geologist to officially open the exhibition. He spoke so passionately about the work and what the changing landscape meant to him it compelled the audience to listen with a genuine interest. Which in turn made viewing the artworks much more enjoyable having an understanding of the meaning of each piece.


4. Send out many invitations - Another main advantage of having three seperate exhibitors is that they each have their own contingency of friends and acquaintences, giving a much wider and diverse audience.


5. Location of exhibition - This needs to be considered in a way that it is reasonably central and easy to find. The particular venue for this exhibition was a centre run by the Local Government, which gave the added advantage of a piece being purchased on behalf of the council (which did occur on the opening night).


6. And last but certainly not least - Present your best pieces of art - If a piece you have created doesn't 'quite make the grade' by your standards, then don't include it in the exhibition. If you are not sure have someone who's opinion you value to give their honest thoughts.


I hope the above points have been of an interest to you, and if you have any of your own advice to add, please do so in the comments.


The Results of My Silver and Woven Necklace


I've finished my necklace with the 'Cambodian Culture' theme, and have named it 'River Flow'.


Hopefully I have achieved the water feel with the colour selection, which was my main focus.


I'm currently adding all my latest pieces to my website and should have it ready to view by this evening.

Sunday, June 22, 2008

Bead Competition Winner Announced........


I have a winner from my 'Give Away - Your Choice of Lampwork Beads' posting .......drum roll.........Congratulations to Crystal 'Krysmh'!

Your lampwork beads will be fresh out of the kiln on Monday and sent off to you.

Thank you to everyone who participated in the competition!


Friday, June 20, 2008

New Necklace and Lampwork Beads in Progress


I mentioned in an earlier post that I was planning to follow a weekly challenge list chosen by a jewellery forum. I am not joining in the challenge on the forum but am doing my 'own' thing. Last week's challenge was 'Cambodian Culture', and as we all are aware the internet is a wonderful research tool. I discovered that each year in Cambodia the Water Festival is celebrated in either October or November at the time of the full moon. The festival celebrates the flow of the Tonle Sap River and gives thanks to Mekong River for the supply of fish and irrigation of their land. Taking all that into account I have worked on the 'water theme' in my new project in progress.


Firstly, I wanted to start with a sterling silver chain section depicting ponds of water. I found in 'Silver Wire Jewelry' book a tutorial for Webwork, which inspired my thinking process. With some alteration these pieces could become my ponds. I wanted a more freeform shape than in the book, they made their shapes by coiling the wire and pulling it out then forming the shape and joining them by hooks. I instead formed the 1.2mm (16g) sterling silver wires into rings, soldered them, then using my round nose pliers I free formed the curves. The webwork is then accomplished by using 0.5mm (24g) of fine silver and wire wrapped on the shaped piece and woven through. Instead of this I used 0.5mm sterling silver, wire wrapped to the shape and just placed one piece across and before wire wrapping the other end added an aqua crackle glass bead to represent the colour and texture of water.


I desired my centre piece to be very reminiscent of a sparkling pool, and have made this focal lampwork bead adding a sparkling aventurine green glass and silver foil which shimmers through a translucent teal.


Reverse Side


Of course it wouldn't be complete without some more of my water themed lampwork beads to add to my usual bubbling over feel. These will all become a part of a woven finish to my piece.


So stay tuned for the completion, I'll have photos for you next week.


Wednesday, June 18, 2008

Need a Soothing Experience?


An amazing animation titled 'Plantage' created by Jakub Dvorsky of Amanita Design as a music video for the Danish band - Under Byen .

This beautiful video of animation art would have to be the best stress relief tool I have encountered. It is truly worth watching! Relaxing music by Under Byen and divine focals of Henriette Sennenvaldt, whose voice can easily be mistaken for Bjork. A tranquil forest setting that magically draws you in.

Enjoy! I hope it has a similar affect on you as I experienced.


Tuesday, June 17, 2008

Latest Woven Necklace


This lampwork focal bead I had created some time ago, and it's been for sale on my lampwork website for way too long. I decided it was meant to be for one of my creations, so I chose the seedbeads, gemstones and complimenting lampwork beads in a colour combination that I felt worked well with the focal. I've chosen turquoise, dyed fossil beads, jade and sodalite gemstones to blend through this piece along with Japanese seedbeads, bone beads and of course my lampwork beads. The choice of colours and design of the focal screams out for this piece to be titled 'Horizon'.


I hope you like my latest!


Monday, June 16, 2008

Take Your Jewellery Photos to Print


I was reading a forum discussion recently regarding designing a jewellery portfolio at Blurb where the book is printed with a cover of your choice and then shipped to you.

A post was added from Dianne Baron who had created a book with Blurb, and seemed happy with the results. There is an added feature where you are able to add your book to the Blurb Bookstore for sale which is what Dianne has done, so you are able to view a sample of her book.

There are also reviews added to Mike DelGaudio's blog. If you read the comments there are a lot of conflicting reviews, and a suggestion that the quality may have been downgraded since the review was first written in 2007.
On the other hand, this thread gives a review of all the types of books available and just received in the past week.

After researching the subject there are a numerous amount of sites available offering this service, such as Lulu; Shutterfly and MyPublisher

I have been very inspired by the availability of this service and the reason for Dianne Baron's printed book. Dianne is a member of a forum who organizes a weekly challenge for their members. They are given a theme and have a week to create a jewellery piece with the theme in mind as inspiration. Dianne participates in these challenges, hence the book covering her year of work of jewellery challenge themes. I'm hoping to take on these themes as a challenge to myself, I'll let you know of my progress.


Friday, June 13, 2008

Handy Jewellery Tips


I'd like to share a few hand hints I've discovered over the years, and hope they may be helpful to some of my readers.

When I am about to start a new project I like to have everything organised, and all together at fingers reach. I went hunting for something to put all my seed beads/gemstones and other beads I needed where they were easily accessible and in view. I found some great paint pallettes, these came in sets of 2 for less than $3.00. I bought them at Big W in the stationery department, if you do not have that store in your location I'm sure they would be available in any large store that carry stationery items.


I like to work with sterling silver, but find the tarnishing that all silver seems to go through in time really frustrating. I now rub Renaissance Wax onto all my completed silver projects and then store them in a ziplock plastic bag. The Renaissance Wax places a coating on the silver which prolongs the tarnishing process. You use such a minute amount, and the tub should last a long time. This product is also used in the British Museum, and is used as a protective coating on metals, furniture, leather, paintings, marble, ivory, etc. Here is a link to one of the stockists, I haven't bought the product from this site so I can't personally recommend their service. Conservation Resources have it available at $20.00 for a 200 ml tin.


As many of you already know I create wearable art using the finger weaving process. When I began in finger weaving I wasn't all that pleased with leaving the knots visible when ending the threads. I now have a method where they are not seen. To do this I place a lampwork spacer bead followed by a gemstone then an 11 seedbead, bring the thread up through the gemstone, then make the knot, add G-S Hypo Cement, cut the thread, and then using my awl I push it up into the centre of my lampwork spacer bead where it cannot be seen.


with visible knots


without visible knots


I found this tip in an old Bead & Button Magazine. If you need to carry seed beads with you to match other beads with them,
an easy and non-spillable way is to string a single colour of beads on a 1" (2.5cm) safety pin. Write a label on a small piece of card for the bead item no. and attach it to the other side of the pin. Slide the loop of the safety pin onto a split ring. Just add as many safety pins of beads as you need.


I hope these have been helpful tips, if you have any you would like to share please add them to the comments.

Thursday, June 12, 2008

Bead Dreams Competition Finalist

The Bead Dreams 2008 competition/exhibition is now over at the Bead & Button Show in Milwaukee. If you would like to read who the winners are just have a look at Zoya Gutina's blog on 2008 Bead Dreams ribbon winners and she also has photos of some of their amazing creations.

I was lucky enough to be a finalist and had my work showing amongst these wonderful artists. This was my "African Queen" piece.


Monday, June 9, 2008

The Results of my Cellini Spiral Project


I made my lampwork beads ready to use in my cellini spiral creation -


I chose the seed beads and gemstones that I thought would best go with the colour scheme -


I made my second cellini spiral, giving me two equal lengths to work with -


I began with making the toggle and loop with the finger weaving method, then added a section of seed beads, gemstones and my lampwork spacer beads. I put all the threads down through the cellini spiral tube and sewed each end using the nymo thread I had left as tails. Continued with my finger weaving....and here is the finished project -


What do you think - a successful project? I'm personally very happy with the outcome and have named it 'Persian Garden'

Friday, June 6, 2008

Give Away - Your Choice of Lampwork Beads

Winner has been Announced


I would like to give away a pair of my lampwork beads to a lucky winner. All you need to do is visit my Mix 'N Match section on my website and browse through the 3 pages and select the bead you would like. Add to the comments here the bead you have chosen (the beads all have an item number). All the entries will go into a draw to pick the winner. I will make a pair of your chosen bead for you (ideal for creating earrings with). The winner will be drawn on 22nd June.

Here are a few examples of my mix 'n match beads - there are over 130 to choose from.


Wednesday, June 4, 2008

My Cellini Spiral Project


I enjoy making my woven pieces a great deal and am constantly searching for inspiration to make them as unique as possible. I'm also very keen to teach myself as many different methods of weaving to incorporate into my pieces. My latest brainwave was to learn Cellini Spiral. Now I made a promise to myself that if anything involved a needle and thread I would quickly run in the opposite direction, as my attempts of sewing and knitting have failed miserably in the past. Given that Cellini Spiral involves a needle and nymo thread, I decided to take the plunge regardless.

I searched the internet for instructions and settled on printing out the instructions from 'Need for Beads'. The start on this type of weaving always throws me into confusion so hence it wasn't the tidiest beginning. I thought I would show you what I have done so far, keeping in mind this miniscule amount of work has taken me many hours, an extremely slow process.


I have woven it fitted onto a biro, I found it so much easier to hold while working, this way. I have left a tail thread to enable it to be attached to the necklace


a close up of the weave


This will be the focal lampwork bead


I'll keep you up on my progress with this project. Fingers crossed it will be a success!

Tuesday, June 3, 2008

Creative Silver Chains by Chantal Lise Saunders

Creative Silver Chains is another book in my collection which I would thoroughly recommend. It begins with an overview of how-to's for soldering, drilling, ring forming, etc. with a wonderful collection of unique jewellery pieces on each and every page. It covers a section on design and is complete with a beautiful gallery of amazing creations. This book gives clear instructions on 20 projects in sterling silver for a necklace or bracelet and all include instructions for matching earrings. If you enjoy soldering and forming you will love this book. It covers some very unique links that I haven't found in other books.


'Teardrop' Page 72


'Demi-Circle' Page 77


'Joined Snakes' Page 85


'Paddle' Page 91


'Square Scale' Page 94


'Butterfly' Page 98


'Bubble' Page 103


This is a necklace I made using the links from 'Teardrop' and my handmade lampwork beads