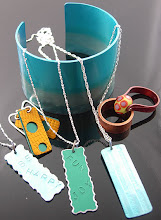
Materials needed:
8cm of 1mm (18G) sterling silver wire
1.8mm sterling silver wire for rings
1 pair lampwork beads
hard silver solder
wire screen netting
Tools needed:
6mm & 10mm mandrels
jeweller's saw
chain nose pliers
soldering torch
pickle pot
hammer
anvil or steel block
wire cutters
tumbler
Method:
1. Wrap the 1.8mm sterling silver wire around a 10mm mandrel to form 2 round links, take the wire rings off the mandrel, using a jewellers saw, open the blade slip the silver onto the blade, fasten the blade and saw down the inside of the wire links.
2. Manipulate the link together so the join is even on 2 of the links, and solder the joins with hard solder.
3. Pickle the links, then using wire netting place over the links and hammer to flatten and texture the links on both sides ( I wrap the netting right around to give an even texture).
4. Cut 6 cm of the 1mm sterling silver wire and solder to the top of the textured ring and pickle.
5. Using a mandrel approx. 6mm in diameter curve the wire around to form the ear wire.
6. With the remaining 2 cm of 1mm sterling silver wire solder to the bottom portion of the textured ring and place in the pickle.
7. Add the lampwork bead to the 2 cm of silver wire, push it up to the top of the wire and place the lower portion on an anvil and hammer flat until the bead cannot pass over the end. Wrap the flattened piece in wire netting and hammer to texture.
8. Place in the tumbler with steel shot and burnishing compound for approximately an hour, and presto a pair of beautiful handmade earrings!


2 comments:
That's fine Jane! Thank you.
We have featured your designs at http://www.handmade-jewelry-club.com/2011/03/variety-of-tutorials-for-kids-and.html
Take a look. Do let your readers know that you have been featured ya! Thanks!
Post a Comment